After completing this lesson, you’ll be able to:
A custom transformer is a sequence of standard transformers condensed into a single transformer. You can turn any existing sequence of transformers into a custom transformer.
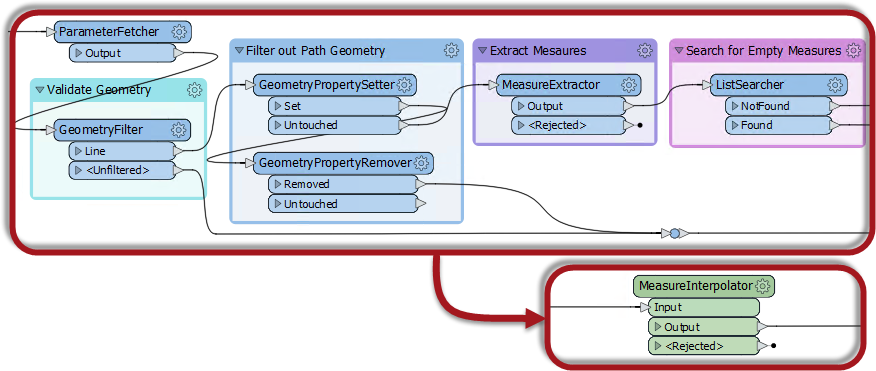
Users can share custom transformers locally, on a network drive, or via the FME Hub. For example, the workspace above has a MeasureInterpolator custom transformer, which a user shared via the FME Hub.
Custom transformers let you:
This course will teach you the basics of creating a custom transformer, controlling its input and output ports, and using parameters to let users control how it works.
If you want to learn more about sharing custom transformers, check out Build a Library of Custom Transformers.
If you want to learn how to use custom transformers with looping, check out Custom Transformers and Loops.
If you want to learn how to use custom transformers to improve your performance with parallel processing, check out Design for Performance.
You can create a custom transformer from scratch – i.e., start with an empty custom transformer and add content into it, or create it from an existing sequence of transformers.
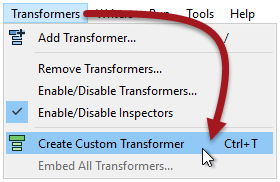
Custom transformers are created by either selecting Create Custom Transformer from the canvas context (right-click) menu or by selecting Transformers > Create Custom Transformer from the menubar. The shortcut key for this function is Ctrl + T (or Cmd ⌘ + T on a Mac).
If several transformers are selected when you issue the Create Custom Transformer command, the new custom transformer will automatically contain them. Otherwise, the new custom transformer will be empty except for an input and output port.
Here a user is creating a new custom transformer based on a series of existing ones:
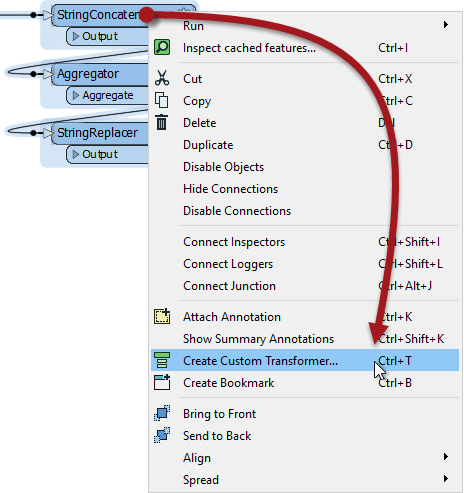
The new custom transformer will contain these three transformers.
All custom transformers require a name and (optionally) a category and description. A dialog to define these automatically appears when you create a new custom transformer.
You can set the category to match any existing FME transformer category or a custom category of your own.
The Use Markdown parameter lets you enter information about the custom transformer, such as requirements for use, development history, and legal terms and conditions, using Markdown.
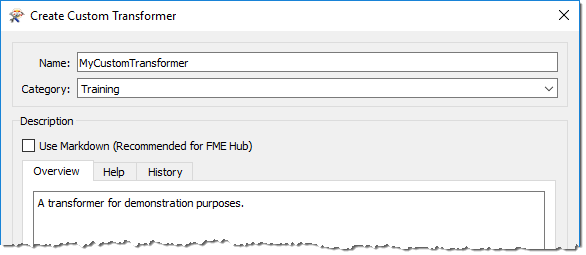
These fields are critical when you intend to share the custom transformer with work colleagues or clients or with the larger FME Community on the FME Hub.
A newly created custom transformer then looks like this:
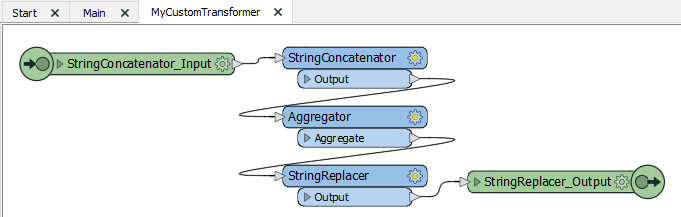
It appears under a new tab on the Workbench canvas and consists of the original transformers with additional input and output objects.
When you click on the Main tab to return to the main canvas view, you will see that Workbench has replaced the original transformers with a custom transformer object:

This custom transformer looks and behaves in the same way as any standard FME transformer, with input and output ports (that match the input/output objects in the custom transformer tab), plus a parameters dialog.
To edit the contents of a custom transformer, click on the tab for that transformer. This action opens the transformer definition, and you may edit the content in the same way you would in the main canvas.
In the Navigator window, where a workspace would have a section labeled Workspace Parameters, a custom transformer has Transformer Parameters:
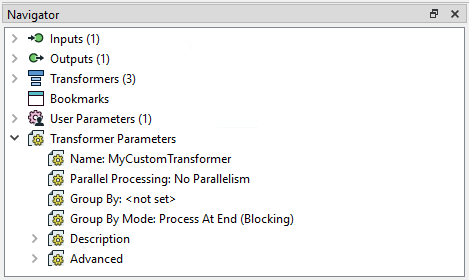
In this section, you can edit the information you entered earlier – name, category, description, etc.
If you create a custom transformer from scratch, without any original transformers selected, it would start empty and look like this:

Then you can start building or editing the transformer from scratch. There is not much difference between creating content in the main canvas and turning it into a custom transformer and creating an empty custom transformer and creating the content in there.
Once you create a custom transformer, it appears on the main canvas and - apart from a different color - looks just like a standard FME transformer.
However, the resemblance to a standard transformer is not just in appearance. In the same way that you can use multiple instances of a transformer in a workspace, you can use a custom transformer any number of times. This feature means custom transformers let you tidy a workspace and reuse content.
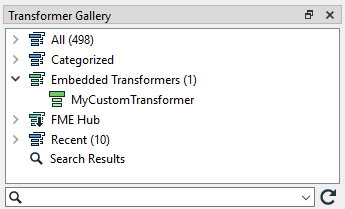
To place extra copies of a custom transformer you use - again like a standard transformer - the Transformer Gallery (look under a section labeled “Embedded Transformers):
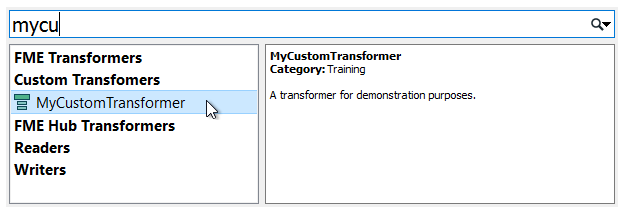
...or you can use Quick Add:
Multiple instances of a custom transformer all use the same core definition, i.e., there may be multiple instances on the Main canvas, but only a single definition exists for all of them.
An essential benefit of this approach is that every instance is updated or edited when the custom transformer definition is changed.
For example, if you change a parameter for the Aggregator inside this custom transformer:
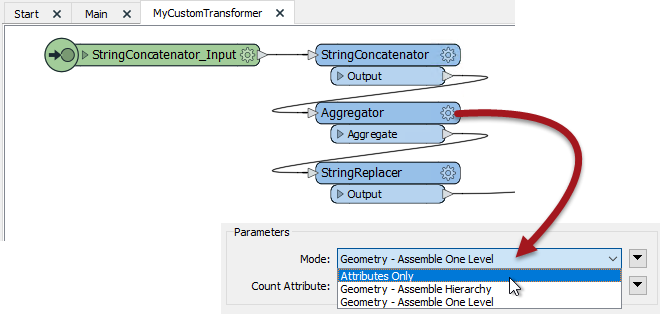
...then the parameter automatically changes for all instances of the transformer in the workspace.
Editing is more straightforward because changes only need to be made once, no matter how many times you have used that custom transformer.
